
I have just made my first candle and I am THRILLED beyond words with its success! It only took about 45 seconds with the hair dryer and turned out perfectly. I am planning my Easter tablescape and also plan to make several for Easter gifts. My only problem has been finding enough candles for all my ideas! One friend suggested putting a resurrection picture on the other side of the candle and so I am excited to try that as well. Also, the Easter collection I ordered from you has blessed my heart and answered my prayer of a few weeks ago that the Lord Jesus would renew my vision of His sacrifice for me. Thank you. Your blogs inspire me as well so I am VERY thankful that I signed up. – Joyce
Easter Essentials
Easter Candle Instructions (see below)
Here’s an easy DIY craft to add beauty and truth to your Easter table. You likely already have everything on hand and it’s easy enough for even a first time DIYer. You’ll need about 10 minutes to create these lovely candles that will give ambiance and reverence to your Resurrection Day celebration.
Grab your supplies to get ready for crafting!
You’ll need:
-3 cream or white pillar candles (3×6 or 3×9 standard size). I picked ours up at Walmart. You can find it at most retailers near you.
-Wax paper
-White tissue paper, the kind you stuff in gift bags
-Tape
-Scissors
-Blow dryer
-Printed design templates (click an option below to download)
- NEW 2020 Easter Candle Templates
- NEW 2020 Holy Week Candle Templates
- Original Easter Candle Templates
Now the how-to:
- Download the latest “I Am” Candle DIY template here and here {Click here for older Designs which are featured in the demonstration below.}
- Tape tissue paper on a regular-sized piece of printer paper. Load that tissue layered piece of paper through the printer and print the template onto it.
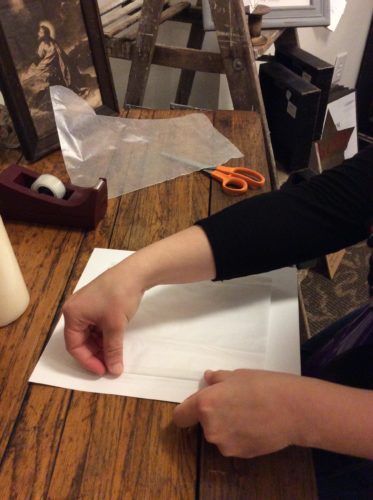
3. Cut out the image, leaving a little margin all the way around.

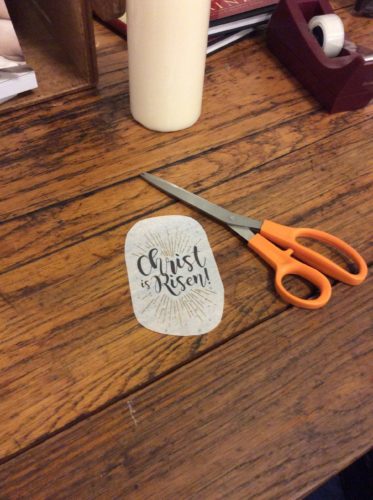
4. Layer a piece of wax paper over the design. Cut a piece of wax paper long enough that it wraps all the way around to the back of your candle. Then line up your template on your candle, holding it in place with the wax paper.
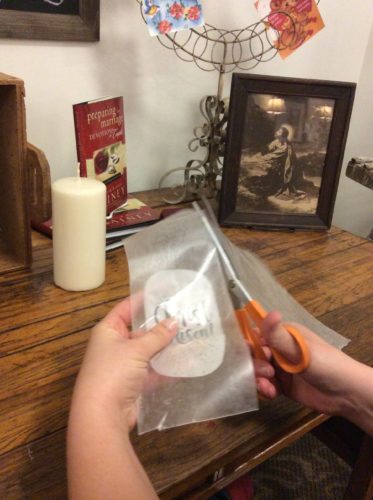
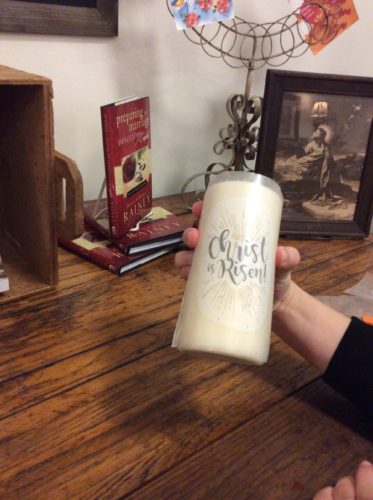
5. Turn your blow dryer on to the highest heat setting. Holding the dryer close to the candle, apply direct heat to the design. As the candle wax heats up, the tissue paper backing will begin to fade. Be patient. Keep applying heat until the tissue paper completely dissolves, about 3-5 minutes.
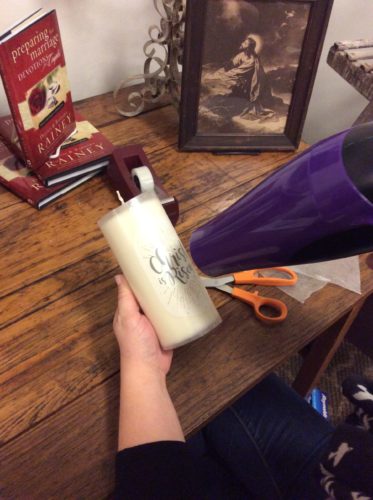
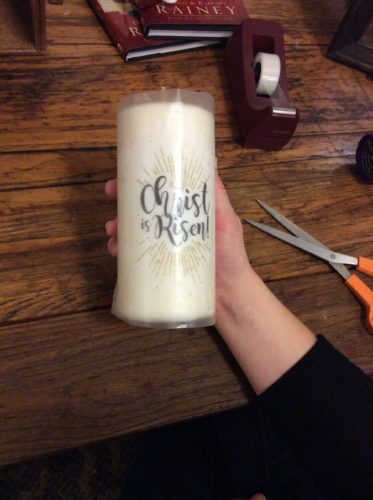
6. Once the tissue paper is completely transparent. peel back the wax paper to reveal your very own Easter table candle!
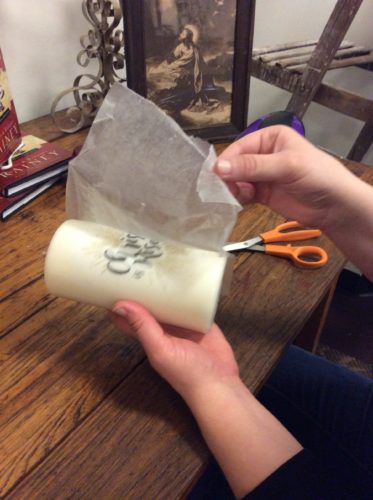
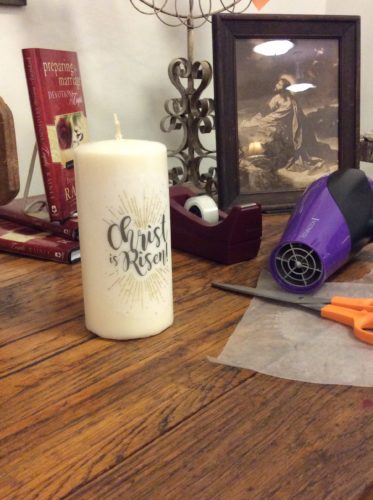
7. Repeat the same steps for each of the three candle designs.
8. Decorate your table with your hand-crafted work!
Also Available for Easter:


I am so happy that our Lord led me to your blog! My candles came our beautiful! Thank you so much! God bless you abundantly and beyond! Rosie :)
Where do you get the transfers?
Sorry for the confusion. We added another section with the templates in the list of items you will need as well as links in the how-to section. All you need to do is click on which template you want and then download the pdf and print. Hope that helps.
awesome blog. thanks for sharing this with all.
Thank you so much for the wonderful idea and the easy-to-follow steps to make the candles! I live in Quebec, Canada and I decided to make your candle but in French so that my friends and family understand what it says! Thank you also for your ideas on how to celebrate Easter, I’ve been thinking and praying so much about how to make it meaningful to my family and friends, especially as I am a new Mom. I really appreciate your exhortation to celebrate Easter well. It as really encouraged me. :)
Hi there, We are so glad you like them and please send us a photo of your candles.We want to see them in French!
Also, can we post them on social media?
Pingback: Resources to Help Your Family Celebrate a Christ-Focused Easter - Thankful Homemaker
I have just made my first candle and I am THRILLED beyond words with its success!
It only took about 45 seconds with the hair dryer and turned out perfectly. I am planning my Easter tablescape and also plan to make several for Easter gifts. My only problem has been finding enough candles for all my ideas! One friend suggested putting a resurrection picture on the other side of the candle and so I am excited to try that as well. Also, the Easter pac I ordered from you has blessed my heart and answered my prayer of a few weeks ago that the Lord Jesus would renew my vision of His sacrifice for me. Thank you. Your blogs inspire me as well so I am VERY thankful that I signed up. Joyce
Joyce,
Thanks for sending this comment in bc your words MADE MY DAY!!!
So so glad you like the candles and want to make more. They are easy and they would make great gifts, too. Like that idea.
Happy Resurrection to you!
Barbara
Is there a download for Christ is Risen for the candles?
Hi Tami,
We do have it on our website. Here’s the link: https://everthinehome.com/easter-candles-diy-2/
Is there a way to print each label individually? When I try to print the whole first page, the edges of the labels end up on my tape. Or maybe you have some other suggestions?
Hi there, I’m sorry I don’t know and you’ll probably just need to experiment with it. Hope it works for you!
So excited to use these as we prepare our home and our hearts for this season! The candles look beautiful! I used LED pillars from the dollar store and ironed them on with a low setting.
That’s wonderful! Thanks for sharing.
The link is dead. I saw the bitly response by barbara and it brought me to the project home. Same issue, dead link, not clickable.
We have it fixed now. Sorry for the technical issues.
I used Dollar Tree candles with come in a narrow glass cylinder. Here is the image resized if anyone would like…
https://www.picmonkey.com/p/domXxZXiysi
I used Dollar Tree candles which come in a narrow glass cylinder then I taped on. Here is the resized image if anyone would like …
https://www.picmonkey.com/p/k0YyEvWZ9dE
Thanks Krista. These are so lovely. My teenage daughter will have a blast making the little candles next week on spring break.
Thank you, Barbara for helping us prepare our hearts to celebrate Easter! I just finished my candles, and they look wonderful! The process was easy and fun! Looking forward to next week!
Is there a template for the 7 I AM advent Easter candles? Unable to find via website. Thanks so much~
Hi Trisha — Templates and instructions can be found here: http://bit.ly/2o2Gck5
It doesn’t seem to work on an inkjet printer, is that correct?
Hi Judith — My ink jet color printer worked and the candles turned out beautifully. Not sure what the issue might be with yours/other inkjet printers? Hope you can get them to work!
The podcast said there were 7 candles???
Hi Dawn – Yep, there are 7. We created a set of them last year that only had 4. You can find both templates and instructions for how to create them here: http://bit.ly/2o2Gck5
That link returns me right back here. I did obtain the 7 candle templates and these instructions describe how to transfer them to the candles but Barbara also talked about how she recommended using them. I only caught bits and pieces because I am at work while listening and was hoping to find those directions written down. All I remember was something about blowing out a candle (each day?) but then what that represents and the rest of the details I did not catch. That is the information I’m looking for.
Thank you.
Hi Paul — Here is the link to the devotional and the “instructions” for blowing out the candles during Holy Week is included. Let us know if you have any other questions. http://bit.ly/HolyWeekAdvent
Fantastic. Thank you so much. As a single dad I need all the help I can get. This helps me add a ‘feminine’ touch – not to mention something i wouldn’t have even thought about until you discussed it on the radio. Thanks again.
Does anyone know if this will work on LED candles – the ones with the waxy outside?
None of us have tried it but the paper wraps will for sure work and we assume the wax transfers will as well since the LED candles are wax coated. Let us know and send a pic!
Would like to print, but we have a laser printer and my husband said sending tissue paper wouldn’t work. Has anyone printed these on a laser printer? He said not very many people have a color laser printer.
Hi Rosemary,
Yes, a laser printer will work. I just printed mine yesterday and they worked fine.
You do have to lightly iron the tissue paper if isn’t really flat and scotch tape it carefully around the edges onto a regular piece of copy paper so it doesn’t catch in the printer.
Hope this helps!
I ironed the tissue paper before taping it, but my printer still jammed. I ended up printing them on plain paper and plan on having my kids mod podge them onto the glass jarred candles from the dollar store, then maybe add a ribbon. They won’t be as elegant but will work for us! Thanks!
I ironed the tissue paper and it worked perfectly both in my laser printer and my friend’s ink jet printer. Thank you, Barbara, for a wonderful idea and for encouraging all of us to celebrate Easter beautifully!
Do you have a picture this is a great project. Love the idea.
TinaN
Thank you for posting! I love Ever Thine Home. My candles look wonderful & I put the decals on both sides of the candles so that each side of the table could enjoy them. I set my table tonight and it looks amazing :O)
Hi Christine do you have a picture?
Everything worked well but my candle melted and when I peeled away the wax paper it left my candle rough and ugly looking :-(
What to do ??? Does anyone have a solution?
Maybe your blow dryer is too hot. The newest ones can be. You can melt down your candles and make something new with it, or put another wrap around it. Wraps made of gold or silver foil is beautiful. Your local hobby store will also have candle wraps that are just for that purpose and should hide the “rough and ugly”. Didn’t you get any drippings? Drip can be beautiful? You can also carve the candle. Here are a few pages of ideas on what to do with your candle. One suggests grating it with a cheese grater. It looked really pretty for Christmas! Here you go, and I hope this helps. I hate it when I get a great idea and it doesn’t turn out the way I imagine.
https://www.hometalk.com/2975198/easy-inexpensive-candle-making?expand_all_questions=1
https://www.hometalk.com/26953788/saving-an-old-ugly-candle?expand_all_questions=1
Have fun! Sometimes the ugly duckling becomes the beautiful swan!
Thank you for this wonderful DIY Easter project. My candles will shine on Easter!
– Make sure that you tape the tissue paper to the copier paper on ALL four sides. I did not do that on my first try. I thought that I broke our copier!
It worked! I’m so thankful for providing such authentic resources!
I cannot them to print on iPad…it goes to iBooks but cannot print
I don’t know if you still are looking at this website Sharline, but can you print to pdf? Then you can print the pdf.
Beautiful. Thank you so much for sharing this. I am making them today for guest gifts. Praise the Lord, He is Risen.
I just downloaded the candle designs and am looking forward to doing this over the weekend. Thank you so much Barbara for sharing this. I am so excited to have these in my home! My plan is to give several away to family too!
Wow! So beautiful! A precious way to honor the Lord and share the Easter message with my international guests! I am gifting some candles to friends with these gorgeous candles! Thank you so much!
Hi there,
I love this practical way to celebrate and teach my children. Thank you!! I’m planning on making these with my 8 yro budding artist girl, I seem to be missing this “TETELESTAI” design. I do have 7 others numbered. Is there an updated file?
Site won’t allow me to submit. Says missing info.. Something to do with value
If you did not get it…Happened to me too. Google auto fill covered where it said 5 digit zip code. That is what it wants there.☺
I did them on battery operated candles and it worked great. Now i will have them for years to come. Thank you.
I was going to ask that question? Great idea!
please help. i am trying to print these on to the tissue paper but am only able to get one design to print entirely. the others have parts missing. i am on my 4th attempt. what do i do?
i tried aligning my printer heads, it worked! i’m so sorry, i should have thought of that before posting my comment. looking forward to making these with my kiddos. THANK YOU for helping us focus more on Easter!
in your print settings, shrink the image so it fits on the page
I shrunk mine to 96% and it worked. You may have to play with it a bit
These are beautiful! I am beyond happy to have these gorgeous candles grace our table shining of His Light! Thank you for making these available to us!!